Water main testing is a quality-control process, not a single pressure reading. Whether the work involves a new installation, a repair, or an extension, crews need a plan that covers pressure testing, disinfection, flushing, sampling, safety, and final documentation.
Reliable equipment supports consistent field results. A hydrostatic test pump can help crews raise and maintain test pressure in a controlled manner. Hurco Technologies, Inc. manufactures utility maintenance and testing equipment in Harrisburg, South Dakota, including water main test pumps and related products for municipalities, water contractors, plumbing professionals, and civil engineers. Its utility-focused equipment range and extensive experience serving water, sewer, and plumbing work make it a relevant resource for practical field-testing needs.
Key Takeaways
- Start with approved plans, local requirements, and project specifications.
- Treat pressure testing and disinfection as separate work activities, each with its own records.
- Remove trapped air, stabilize the test section, and use calibrated gauges.
- Plan flushing and sample collection before chlorination begins.
- Keep complete records so the owner, inspector, and crew can verify what occurred.
Table of Contents
- Why Water Main Testing Matters
- What to Confirm Before Testing
- How Pressure Testing Works
- Choosing Reliable Field Equipment
- Planning the Disinfection Step
- Flushing, Sampling, and Verification
- Records That Help Prevent Disputes
- Safety Practices for Crews
- Common Mistakes to Avoid
- A Field Checklist for 2026
Why Water Main Testing Matters
Testing helps confirm that a defined section of main can perform as required before it is accepted or returned to service. It can reveal leaks at joints, fittings, valves, service connections, temporary caps, or restraints. It also creates a documented checkpoint between installation and final approval. Testing does not replace proper bedding, restraint, installation inspection, or adherence to the approved design.
For example, a newly installed main may pass its pressure test yet still need disinfection, controlled flushing, residual checks, and satisfactory water-quality samples. Pressure performance alone does not demonstrate that the main is ready for potable service.
What to Confirm Before Testing
Before equipment reaches the site, review the documents that govern the work. Test details can differ by pipe material, diameter, project scope, utility practice, and authority having jurisdiction. Confirm the following items with the project team:
- Approved plans, specifications, and required witness points.
- Pipe material, diameter, length, and limits of the test section.
- Required test pressure, duration, and allowable leakage or pressure loss.
- Valve, hydrant, blow-off, air-release, and temporary restraint locations.
- Approved water source, backflow protection, and isolation arrangement.
- Disinfection procedure, sample locations, laboratory instructions, and acceptance process.
How Pressure Testing Works
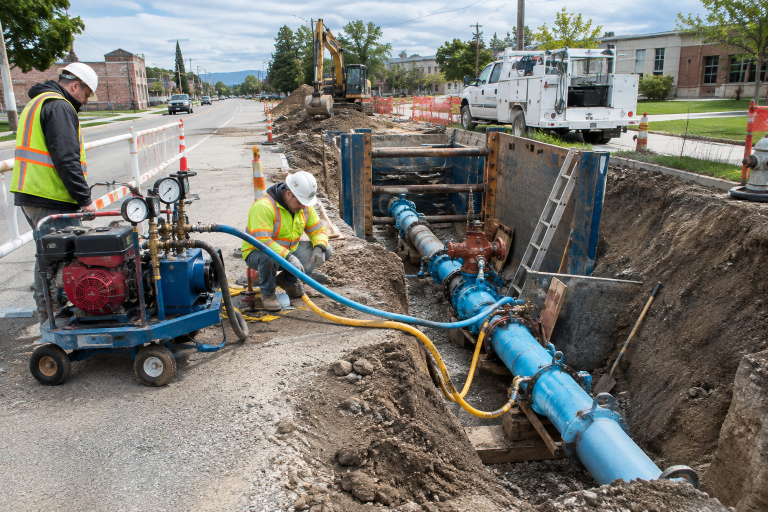
A sound test begins with inspection. Verify that caps, plugs, fittings, thrust restraints, and temporary connections are suitable for the planned pressure. Fill the line slowly through an approved connection and provide a path for air to escape. Trapped air can produce unstable readings and create additional stored-energy hazards.
Basic Testing Sequence
- Inspect the isolated test section and confirm that all restraints are secure.
- Fill the main gradually while opening approved air-release points.
- Allow conditions to stabilize before recording final test values.
- Increase pressure in controlled steps according to the approved procedure.
- Record starting pressure, ending pressure, elapsed time, and any makeup water.
- Compare the result with the project specification and authority requirements.
Do not rely on one questionable reading. A second calibrated gauge or an independent verification method can help identify a damaged gauge, a blocked connection, or another equipment issue before it results in a failed test.
Choosing Reliable Field Equipment
Select equipment for the actual pressure range and connection arrangement, not simply for maximum capacity. Field crews benefit from a stable pump setup, accessible controls, durable hoses, rated fittings, dependable valves, drain points, and gauges with current calibration records. Keep spare seals, adapters, and commonly used fittings available when the work plan permits, since small connection problems can delay an entire test.
Planning the Disinfection Step
Disinfection should be planned as its own operation after pressure testing is complete. The process may involve cleaning and preparation, application of an approved disinfectant, a required contact period, flushing, residual testing, and microbiological verification. The exact sequence must follow the utility procedure, state requirements, and contract documents.
Professionals reviewing current practices can consult AWWA C651 disinfection work when tracking standards activity related to preparation, flushing, disinfectant testing, and microbiological validation. Do not assume that one dosage, contact time, or sampling rule applies to every project.
Flushing, Sampling, and Verification
Controlled flushing removes disinfectant and can help clear sediment or construction debris. Plan the discharge route before opening a hydrant, blow-off, or other outlet. Crews should protect streets, nearby property, drainage structures, and waterways from erosion, flooding, or unsuitable discharge.
- Confirm the approved discharge location and flow-control method.
- Perform required field checks for disinfectant residual.
- Collect samples at approved locations using the required handling procedures.
- Label samples with the location, date, time, project, and test section.
- Wait for required laboratory results and utility approval before placing the main into service.
Records That Help Prevent Disputes
A complete report creates a useful history for closeout, inspection, and future troubleshooting. Record the project name, test section, pipe size and material, approximate length, equipment identification, gauge calibration dates, weather conditions, start and finish times, pressure readings, makeup water or leakage observations, disinfection details, sample results, and approval signatures.
Safety Practices for Crews
Pressurized pipe systems store energy. A cap, fitting, hose, or temporary restraint that fails can move suddenly and violently. Establish an exclusion zone, keep unnecessary personnel away from the setup, and inspect all connections before pressurization. Never tighten, repair, disconnect, or remove a component under pressure. Release pressure fully before changing the test arrangement, and coordinate valve operation with the utility.
Common Mistakes to Avoid
- Beginning before the test procedure and witness requirements are confirmed.
- Ignoring trapped air or skipping stabilization time.
- Using gauges without verified calibration status.
- Testing against a closed, leaking, or improperly isolated valve.
- Failing to inspect temporary caps and restraints.
- Flushing without a discharge-control plan.
- Assuming a successful pressure test proves water quality.
- Submitting incomplete records after the crew leaves the site.
A Field Checklist
- Review current specifications and utility procedures.
- Confirm the test section, isolation points, and valve arrangement.
- Inspect caps, restraints, hoses, fittings, valves, and gauges.
- Verify calibration records and approved water-source protection.
- Plan air removal, stabilization, flushing, and discharge control.
- Complete the pressure test and document every reading.
- Perform disinfection under the approved procedure.
- Flush, collect samples, receive approval, and store final records.
Conclusion
Successful water main testing involves more than reaching a target pressure. Careful planning, safe equipment, accurate measurements, proper disinfection, controlled flushing, and complete documentation help reduce rework and support dependable service. Treating each step as part of one coordinated quality-control process gives owners and crews a clearer record of the completed system.