A socket hidden behind the wrong part of a television bracket can make a carefully designed media wall awkward to use. So can a cupboard that fits a games console but leaves no room for its cables. These are small details on a drawing, but much harder to change once the wall is plastered and the cabinetry is painted.
When planning a media wall during a renovation, agree the viewing position, equipment, cable routes, storage and maintenance access before first fix. In this context, first fix means the work on concealed wiring, supporting construction and other elements that need to happen before surfaces are closed up. The precise sequence will depend on the design and the wider refurbishment.
You do not need to choose every handle at this stage. You do need a shared plan that gives the joiner, electrician and other installers enough information to work together.
Start with the sofa and the actual equipment
The centre of an empty wall is not always the best place for a television. Doorways, windows, seating and the route through the room all affect where the screen should sit.
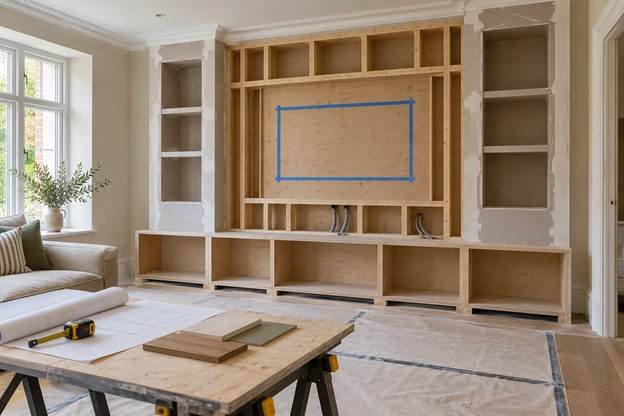
Mark the proposed screen outline on the wall with masking tape, then look at it from your normal seated position. Consider daytime reflections as well as how the room looks in the evening. If the furniture is changing, mark out the sofa position too. A screen height chosen while standing in an unfinished room may feel quite different once you sit down.
Choose the television model before finalising a close-fitting recess. The advertised screen size does not tell the installer everything: overall dimensions, connection positions, bracket compatibility and required clearances matter too. LG’s installation guidance highlights the need to check the installation space, ventilation clearance and suitability of the mounting location. lg.com
Make an equipment list alongside the drawing. Include the soundbar, consoles, television box, network equipment and anything else that will live in the unit. Record dimensions with plugs and cables connected, rather than measuring the box alone.
Plan power and cable routes together
“Hide all the wires” is a useful design aim, but it is not a complete electrical brief.
The electrician needs to know which devices require power, where they will sit and how someone will reach their connections. A socket position should be checked against the actual bracket and screen, not simply placed somewhere inside the television outline.
Agree where signal and data cables need to run, including any connection between the television and equipment in lower cupboards. Ask the installer how those cables could be replaced later. A route that accommodates the cable itself may still be awkward if its fitted connector cannot pass through.
If a spare cable route is proposed, confirm its size, entry points and accessibility with the relevant installers. Leave the electrical design, cable selection and installation methods to a competent electrician. Electrical Safety First recommends using an electrician registered with a government-approved scheme for electrical installation work in the home. Powering change + saving lives
Keep a labelled record of the agreed connections. “Console cupboard to TV” is more useful at handover than several identical loose leads with no explanation.
Make room for ventilation and future access
A media wall should allow someone to disconnect equipment, replace a cable and remove the television without dismantling the surrounding joinery.
Start with the instructions for each appliance. Ventilation requirements differ, so there is no single gap that suits every television, console or amplifier. A tidy-looking enclosed cupboard may need a different arrangement from an open shelf.
Discuss removable panels, access openings and adjustable shelves while the cabinetry is being designed. Check how doors, hinges and drawer runners affect the usable space. The internal width on a drawing is only part of the picture if a hinge blocks the route for a large device.
Give lighting equipment the same attention. If shelves include LEDs, agree where the drivers and controls will be located and how they can be reached for maintenance. Concealing them should not mean permanently sealing them behind a finished surface.
Where an electric fire is included, select the model early and coordinate the design with its specific installation instructions. Its ventilation, clearances and access requirements need checking alongside the television and surrounding materials. A photograph of another installation cannot establish what is suitable for yours.
Agree the joinery depth, finishes and lighting
The depth of the finished media wall affects the whole room. Mark its front edge on the floor and check the remaining circulation space, especially beside doors or between the cabinetry and a sofa.
Then decide what the storage must hold. Books, children’s toys and audiovisual equipment need different shelf arrangements. Open shelves can work well for display, while doors keep everyday clutter out of sight. A mixture is often more useful than filling every available space with decorative niches.
Finish choices also need coordination. Painted cabinetry, timber-effect panels and plastered sections meet differently at corners, skirting and ceiling lines. Ask who is responsible for each junction and which surfaces will be finished before installation.
Nemo Group UK’s bespoke media wall and fitted TV unit service brings together cabinetry, equipment access and any agreed electrical and decorating work. That illustrates a useful point when preparing a brief: the appearance and the practical installation should be discussed together. Nemo Group UK
For shelf lighting, agree the colour temperature, controls and whether the light source should be visible. Where possible, view a sample against the proposed finish before committing to the full installation.
Put the decisions on one coordinated drawing
Before first fix begins, bring the important information together in a dimensioned elevation and, where needed, a plan or section showing depth.
The shared information should identify:
- The finished floor level, television position and bracket arrangement.
- Cabinet dimensions, equipment locations and door openings.
- Socket, data and signal connection positions.
- Lighting locations, controls and maintenance access.
- Appliance clearances and any outstanding manufacturer requirements.
Have the relevant installers review the same revision. Confirm who checks the supporting construction and fixings, who supplies each component and when final measurements will be taken. Existing walls and floors may change during refurbishment, so distinguish early design dimensions from measurements approved for manufacture.
Before concealed work is covered, arrange a review with the responsible trades and keep photographs of agreed routes and support locations. Record subsequent changes on the drawing.
The useful next step is a short coordination meeting before first fix: take the equipment list, marked-up room layout and proposed cabinetry drawing, then resolve any unanswered questions. Those decisions give the finishing work a clear foundation and make the completed media wall easier to live with.