Introduction
There are few sights on Earth as breathtaking as the glowing ribbons of color that dance across the polar skies — the Northern Lights. For photography enthusiasts, capturing these celestial displays can be a dream come true. Whether you’re new to photography or have some experience behind the lens, joining northern lights photography tours offers a structured and rewarding way to experience nature’s most mesmerizing light show. In this ultimate guide, we’ll explore everything you need to know to plan, prepare, and photograph the aurora successfully. You’ll learn what equipment you need, the best settings to use, how to stay safe and warm, and, most importantly, norway northern lights when to go for the best experience.
Understanding the Magic of the Northern Lights
Before you can photograph them, it’s important to understand what the Northern Lights actually are. Scientifically known as the aurora borealis, these lights are created when charged particles from the sun collide with gases in the Earth’s atmosphere, producing colorful streaks of green, pink, and sometimes purple light. This natural phenomenon is best viewed in polar regions, especially in areas close to the Arctic Circle. That’s why aurora lights in Norway have become such a popular destination for travelers and photographers alike. The combination of high-latitude locations, clear dark skies, and dramatic landscapes makes Norway one of the best countries in the world to witness this incredible spectacle.
For beginners, northern lights photography tours can be especially helpful because they take care of logistics such as transport, timing, and finding dark-sky locations far away from city lights. Understanding the science behind the aurora also helps you appreciate why patience is key — the display depends on solar activity, weather conditions, and magnetic fields. Once you learn how these elements interact, you’ll be able to anticipate the best moments to capture the sky in full bloom.
Planning Your Northern Lights Photography Adventure
Planning is the foundation of a successful photography trip. One of the most crucial decisions is figuring out norway northern lights when to go. Generally, the aurora is visible between late September and early April when the nights are long and the skies are dark. However, the best months are typically from November to March, as these months offer longer periods of darkness and colder, clearer skies.
When choosing a tour, look for those that offer small group sizes and include local guides who are experienced photographers. Many northern lights photography tours in Norway are designed specifically for beginners, providing step-by-step guidance on camera settings and composition. You can often find packages that include accommodation, meals, and transportation to prime viewing areas like Tromsø, Alta, or the Lofoten Islands. Each of these regions has its own unique charm — from snow-covered mountains to frozen fjords — which can add depth and beauty to your aurora photos.
It’s also smart to plan some flexibility into your itinerary. Weather in the Arctic can be unpredictable, and cloud cover may obscure the lights on some nights. Booking a tour that lasts several days increases your chances of witnessing the aurora at its brightest.
Essential Photography Gear for Capturing the Aurora
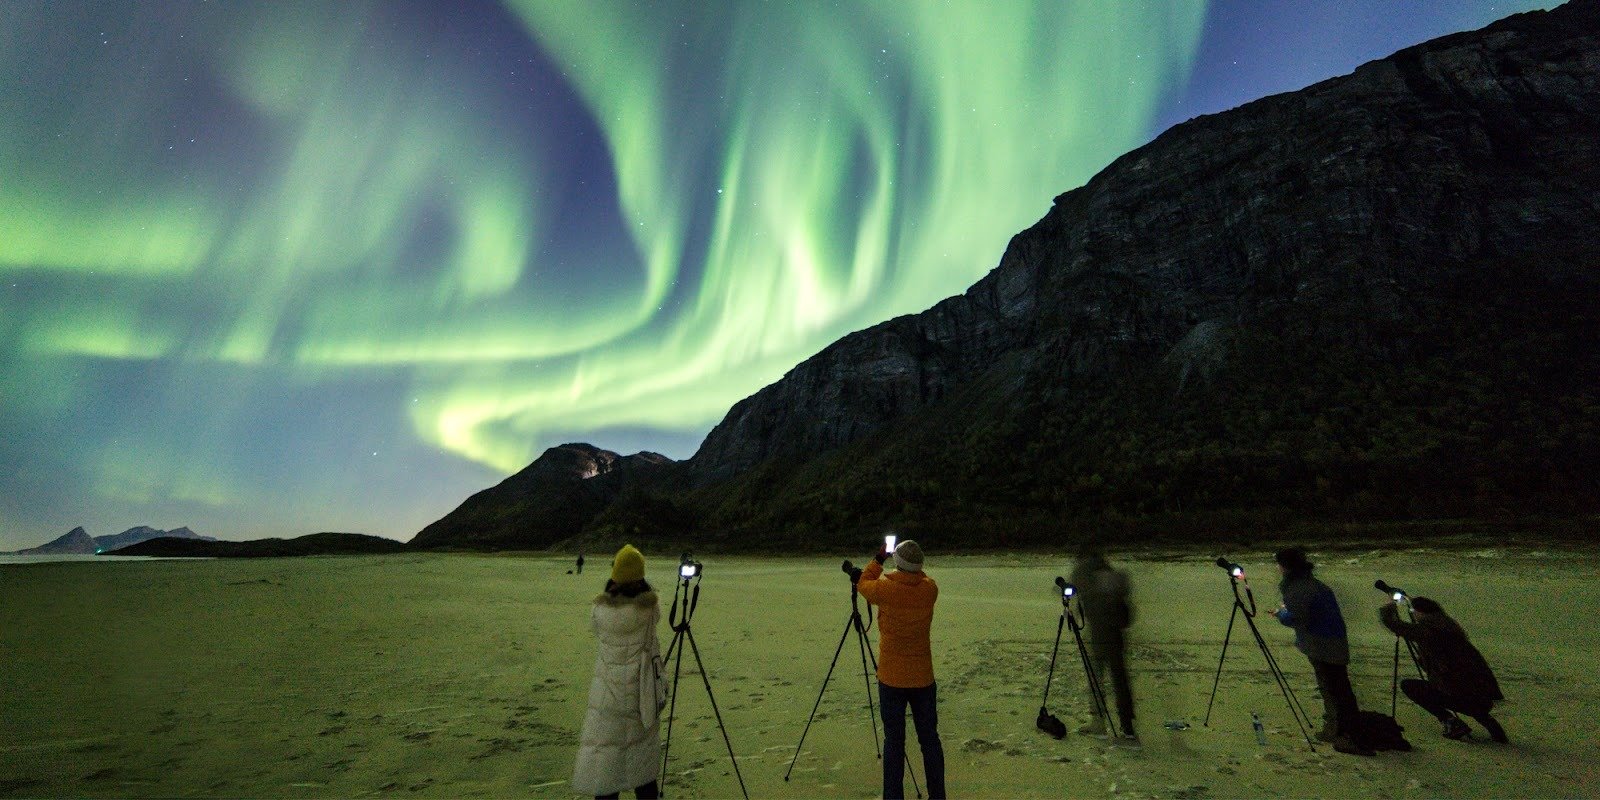
When you embark on aurora lights photography adventures, having the right gear can make all the difference. Start with a camera that allows manual settings — ideally a DSLR or mirrorless camera with a wide dynamic range. Pair it with a sturdy tripod, as you’ll be shooting long exposures that require absolute stability. A wide-angle lens with a large aperture (f/2.8 or lower) is perfect for capturing both the lights and the landscape beneath them.
In addition to the camera and lens, remember to bring spare batteries. Cold weather drains batteries quickly, so keep extras in an inner pocket close to your body to stay warm. A remote shutter release or intervalometer is another useful tool, allowing you to take long exposures without touching the camera, which can cause blur. For your comfort, dress in layers, wear thermal gloves that allow you to handle camera controls, and carry hand warmers.
Whileaurora lights in Norway are bright enough to be seen by the naked eye, they often appear much more vibrant in photos. Your camera sensor can pick up colors and patterns that may be invisible to your eyes. With the right setup and preparation, you’ll be amazed by what you can capture on your very first night.
Mastering Camera Settings and Techniques
To get the best results from your aurora lights photography, it’s essential to understand your camera settings. Start by setting your camera to manual mode so you have full control over exposure. A good starting point is an ISO between 800 and 3200, depending on how bright the aurora is and how much ambient light there is in the scene. Set your aperture as wide as possible (f/2.8 or lower) to let in more light.
For shutter speed, experiment between 5 to 15 seconds. Longer exposures can create smooth, flowing ribbons of light, while shorter exposures capture sharper, more defined patterns. Remember to focus manually on a distant object or star to ensure your images are crisp. Autofocus may not work well in low light, so it’s best to switch it off once you’ve focused.
If your northern lights photography tours include instruction, your guide will likely help you fine-tune these settings. They can also teach you how to use your histogram to avoid overexposure and how to adjust white balance to maintain natural colors. With practice, you’ll learn how small tweaks in your settings can completely transform your images.
Choosing the Best Locations in Norway
Norway is one of the top destinations for aurora lights in Norway photography because it offers stunning natural backdrops and frequent aurora activity. The most famous place is Tromsø, often called the “Gateway to the Arctic.” It’s easy to reach and offers a mix of urban comforts and wild, remote viewing areas. The Lofoten Islands are another favorite, with their dramatic peaks, fishing villages, and crystal-clear skies.
If you prefer something quieter, consider Alta or Kirkenes, both located in the far north where light pollution is minimal. These towns often serve as bases for northern lights photography tours that include snowmobile trips or reindeer sled rides under the dancing sky. For those who want even more adventure, Svalbard — an archipelago deep within the Arctic Circle — offers surreal photo opportunities, especially during the polar night when the sun doesn’t rise for months.
Each location offers its own challenges and rewards. Coastal areas may have more variable weather, but they also provide reflections of the aurora in the water, creating magical compositions. Inland regions often have clearer skies, making them ideal for more consistent viewing.
Staying Safe and Comfortable in Arctic Conditions
When you travel for aurora lights photography, remember that the Arctic environment can be harsh. Temperatures often fall below freezing, and wind chill can make it feel even colder. Layering is the key to staying warm — start with moisture-wicking base layers, add insulating mid-layers, and finish with a waterproof outer shell. Protect your hands and feet with insulated gloves and boots designed for winter use.
If you’re part of northern lights photography tours, your guides will brief you on safety and provide advice about the local conditions. Always follow their instructions, especially when traveling in remote areas. Avoid walking on frozen lakes or venturing into the wilderness alone. Bring a thermos of warm drink, and keep snacks handy for energy.
Also, keep your camera equipment safe from condensation. When moving from the cold outdoors to warm indoors, seal your camera in a plastic bag to allow it to gradually adjust to the temperature difference. Proper preparation ensures that you can focus on capturing the beauty of the aurora instead of battling the elements.
Post-Processing Your Aurora Photos
After your trip, it’s time to bring out the full potential of your images through post-processing. Even though aurora lights in Norway look stunning straight from the camera, editing allows you to refine exposure, contrast, and color balance to make them shine. Programs like Adobe Lightroom or Capture One are great for beginners, as they allow non-destructive adjustments.
Start by adjusting the white balance to achieve realistic colors — too warm, and your greens will turn yellow; too cool, and they may look unnatural. Boost contrast slightly to emphasize the shape of the lights, and reduce noise that often appears in long-exposure images. Many aurora lights photography professionals recommend minimal editing to preserve the natural look of the scene.
You can also experiment with cropping or straightening your images to improve composition. The key is to enhance what’s already there, not to alter the authenticity of the moment. Once you’ve edited your photos, you’ll have stunning memories to share with family and friends — proof of your adventure under the Arctic skies.
Conclusion
Capturing the Northern Lights is one of the most unforgettable experiences a photographer can have. Through northern lights photography tours, beginners gain expert guidance, access to ideal locations, and the chance to witness the magic of nature firsthand. Knowing norway northern lights when to go, bringing the right equipment, and mastering key techniques can elevate your results from simple snapshots to breathtaking works of art.
The combination of skill, patience, and preparation is what makes aurora lights photography so rewarding. The swirling greens and purples above snow-covered landscapes create scenes that seem almost otherworldly. When you stand beneath the sky and see the aurora lights in Norway come alive, you’re not just taking pictures — you’re capturing a piece of Earth’s most extraordinary natural wonder. Whether it’s your first time or your fiftieth, the Northern Lights will always inspire awe, reminding you that the universe is full of color, mystery, and endless possibility.