Choosing the Right Solar Panels and Installers
So, you’re thinking about going solar. That’s pretty cool. But before you get too excited about those lower electricity bills, there are a couple of big things to figure out first: what kind of panels you’ll actually need and who’s going to put them on your roof. It’s not just a simple ‘buy and install’ situation, you know?
Understanding Panel Efficiency and Roof Suitability
First off, not all roofs are created equal when it comes to soaking up the sun. In the US, a roof that faces south is usually the sweet spot, getting the most direct sunlight throughout the day. This can make a big difference in how much power you actually generate – sometimes up to 15% more than an east or west-facing roof. You also gotta look out for anything that might cast a shadow, like tall trees or even your own chimney. Those shadows can really mess with how well your panels work.
Here’s a quick rundown on what makes a roof good for solar:
- Direction: South-facing is generally best in the US.
- Shading: Check for trees, buildings, or other things that block the sun.
- Angle: The tilt of your roof matters for catching rays.
Beyond just the sun’s path, you need to think about the roof itself. Is it in good shape? If your roof is old or needs repairs, you’ll probably have to fix that before you can even think about putting panels on it. Installers usually won’t put panels on a roof that’s about to give out. It’s just asking for trouble down the road.
It’s easy to get caught up in the excitement of solar energy, but taking the time to assess your roof’s condition and its sun exposure is a really important first step. Skipping this can lead to lower energy production or even costly repairs later on.
Selecting Reputable Solar Installers
Finding the right person or company to do the installation is just as important as picking the panels. You want someone who knows what they’re doing, has a good track record, and isn’t going to disappear after the job is done. Getting multiple quotes is a must – don’t just go with the first one you talk to. Compare prices, but also look at their experience, especially with local rules and permits. A good installer will be up-to-date on all the codes and make sure everything is done safely and correctly.
Evaluating Panel Manufacturers and Warranties
When you’re looking at panels, don’t just grab the cheapest ones. Check out the manufacturer. Are they a well-known company? What kind of warranty do they offer? Most panels come with a performance warranty (saying they’ll produce a certain amount of power for 20-25 years) and a product warranty (covering defects). It’s worth spending a bit more for panels from a company that’s likely to be around to honor that warranty if something goes wrong. You’ll want to compare different brands and their specs to see what fits your needs and budget best.
Preparing Your Home for Solar Installation
Before you even think about panels going up, there are a few home-related things to sort out. It’s like getting your house ready for a big renovation, but for sunshine power.
Assessing Roof Condition and Age
Your roof is basically the foundation for your solar setup. If it’s looking a bit tired, maybe it’s seen better days, or it’s just really old, you might need to get some work done before the solar crew can even start. Installers usually won’t put panels on a roof that needs repairs or is nearing the end of its life. Think about it: you don’t want to install a new system only to have to take it all down a few years later because the roof underneath gave out. It’s worth checking out the general health of your roof – look for any loose shingles, water damage, or sagging spots. If your roof is older than 15-20 years, it’s definitely a good idea to get a professional opinion on its condition.
Ensuring Adequate Roof Space
Not all roofs are created equal when it comes to space. You need enough clear, unobstructed area to fit the number of panels needed to power your home. South-facing roofs are generally the best in the US because they get the most sun throughout the day. However, east or west-facing roofs can still work, they just might be a bit less efficient. Also, keep an eye out for anything that might cast a shadow on the panels, like tall trees, neighboring buildings, or even chimneys. Too much shade can really cut down on how much electricity your system generates. If your roof space is limited or not ideally positioned, don’t despair – sometimes a ground-mounted system is an option if you have the yard space.
Understanding Local Regulations and Permits
This part can be a bit of a headache, but it’s super important. You’ll need to figure out what local rules and permits apply to solar installations in your area. Sometimes, especially if your house is in a historic district or is a listed building, you might need special permission. Your solar installer should be able to help you with this, as they usually handle the permit applications. It’s also a good idea to check with your homeowner’s association (HOA) if you have one, as some have specific guidelines about how solar panels can look or where they can be placed. Getting these details sorted upfront saves a lot of hassle down the line.
It’s easy to get caught up in the excitement of going solar, but taking the time to prepare your home properly is key. A solid roof, enough clear space, and sorted permits mean a smoother installation and a system that works its best for years to come. Don’t skip these steps; they’re the groundwork for your clean energy future.
Here’s a quick rundown of what to consider:
- Roof Condition: Is it sturdy? Any leaks or damage?
- Roof Age: How many years does it have left?
- Sun Exposure: How much direct sunlight does the roof get daily?
- Shading: Are there trees, buildings, or other obstructions?
- Available Space: Is there enough room for the panels you need?
- Local Rules: What permits or approvals are required?
- HOA Guidelines: Any specific restrictions from your neighborhood association?
Navigating Financing and Incentives
So, you’re thinking about going solar. That’s awesome! But before you get too excited about those lower electricity bills, let’s talk about the money side of things. It can seem a bit confusing with all the different options out there, but it’s really worth figuring out.
Exploring Available Financial Incentives
Governments and local programs often have ways to help you out with the cost of solar. Think of them as thank-yous for choosing clean energy. These can come in different forms, like direct rebates or grants that lower the upfront price of your system. The U.S. Department of Energy, for example, has programs that give money to states, and those states can then help out homeowners and businesses. It’s a good idea to check what’s available in your specific area because these programs can change.
- State and Local Rebates: Many states and cities offer direct cash back or discounts on solar installations.
- Federal Tax Credits: The federal government often provides a tax credit, letting you deduct a percentage of your solar system’s cost from your federal taxes.
- Performance-Based Incentives (PBIs): Some programs pay you based on the amount of electricity your solar panels generate.
Understanding Tax Relief Options
Beyond direct incentives, there are tax benefits that can really make a difference. For homeowners, the federal solar investment tax credit (ITC) is a big one. It allows you to subtract a percentage of the cost of your solar system from your federal taxes. For businesses, there are things like capital allowances, which let them deduct a portion of the installation costs from their taxable profits. This can significantly reduce your overall tax burden. It’s smart to talk to a tax professional to see exactly how these apply to your situation.
Comparing Financing and Lease Agreements
When it comes to paying for your solar setup, you’ve got a few main paths. You can pay cash upfront, which is great if you have the funds because you own the system outright from day one. Another popular option is a solar loan. This is like a mortgage for your solar panels, and you own the system once it’s paid off, while enjoying the savings. Then there are leases and Power Purchase Agreements (PPAs). With a lease, you pay a monthly fee to use the solar system installed on your roof, and the leasing company owns it. With a PPA, you agree to buy the electricity the system produces at a set rate, often lower than your utility company’s rate. The company that installs the system usually owns it. Each has its own pros and cons, so think about what makes the most sense for your budget and your long-term goals.
Choosing the right financing method is just as important as picking the right panels. It affects your upfront costs, your monthly payments, and who actually owns the system. Take your time to compare these options carefully.
The Solar Panel Installation Process
Alright, so you’ve picked out your panels and found a good installer. Now comes the part where everything actually gets put together. It might seem like a lot, but breaking it down makes it way less intimidating. The whole solar panel installation process is pretty structured, and your installers will have a plan.
Setting Up Safety Measures and Scaffolding
This is the first big step, and it’s all about making sure everyone stays safe. Working on a roof, especially with tools and equipment, can be risky. Installers will set up scaffolding or other safety gear to make sure they have stable footing and can reach everything they need without taking unnecessary chances. This initial setup is super important for preventing accidents down the line. It might take a good chunk of the day, but it’s definitely worth the time to get it right.
Installing the Solar Panel Mounting System
Once the safety setup is solid, the next job is putting in the mounting system. These are the racks that will hold your solar panels in place. They need to be attached securely to your roof or ground structure. The angle and direction of these mounts are usually set to catch the most sunlight, which is key for getting the best energy production. Think of it like setting up a picture frame perfectly straight – it matters for how it looks and functions.
Positioning and Securing Solar Panels
With the mounts ready, it’s time to actually put the solar panels on. This involves carefully lifting them into place and aligning them on the mounting system. They’ll be tilted at the right angle to grab as much sun as possible. Once they’re positioned just right, they get bolted down. This makes sure they’re not going anywhere, even in strong winds. It’s a pretty methodical process, making sure each panel is snug and secure.
Electrical Connections and System Integration
Wiring Solar Panels Correctly
Once the panels are all mounted up, it’s time to get them talking to each other and the rest of the system. Most solar setups use these handy MC4 connectors, which makes hooking things up pretty straightforward. You’ll typically connect the panels in either a series or parallel arrangement. A series connection boosts the voltage, while a parallel connection increases the current. The choice depends on what your inverter is designed to handle and the overall system goals. Getting these connections right is super important for the system to work efficiently and safely. It’s like setting up a string of Christmas lights – one loose connection and the whole thing might not light up.
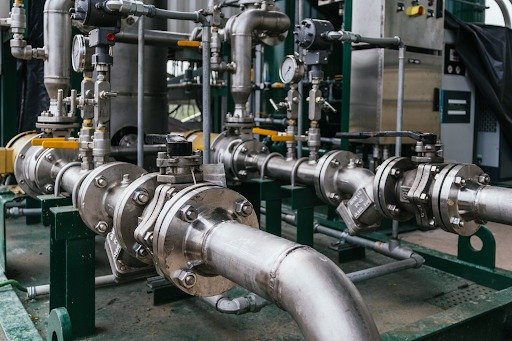
Installing and Connecting the Solar Inverter
The inverter is the brain of your solar setup. It takes the direct current (DC) power that the panels generate and turns it into the alternating current (AC) power your home uses. You’ll want to put the inverter in a cool, shaded spot, usually not too far from your main electrical panel. The positive and negative wires from your solar array need to be connected to the correct terminals on the inverter. If this part isn’t done right, you could have problems, and nobody wants that. Companies like Synergy Electric Solutions often handle this part, making sure it’s all up to code.
Integrating Battery Storage Systems
If you’re adding a battery to your system, this is where it gets linked in. The battery acts like a backup power source, storing excess energy generated during sunny hours for use when the sun isn’t shining. Connecting the battery to the inverter is similar to connecting the panels – positive to positive, negative to negative. This setup lets you use your own solar power even after the sun goes down or during cloudy spells. It’s a great way to get more out of your solar investment and have a bit more energy independence.
Post-Installation and System Maintenance
So, you’ve got your shiny new solar panels humming away on the roof. That’s awesome! But the job isn’t quite done yet. There are a couple of important steps to wrap things up and make sure your system keeps running smoothly for years to come.
Connecting the System to the Power Grid
This is a big one. Your solar setup needs to talk to the utility company’s grid. Usually, your installer handles this, but it’s good to know what’s happening. They’ll coordinate with the power company to get the official go-ahead. This notification process is important so the grid knows you’re now a contributor, not just a consumer, of electricity. It helps them manage the flow of power across their network.
Monitoring System Performance
Once everything’s hooked up, you’ll want to keep an eye on how your system is doing. Most modern solar setups come with monitoring apps or online portals. You can see how much energy you’re generating, track your usage, and even get alerts if something seems off. Regularly checking these stats helps you catch any potential issues early on. It’s like giving your system a quick health check-up.
Here’s what you might look for:
- Daily Energy Production: How much power are your panels making each day?
- System Status: Is everything showing as ‘online’ and working correctly?
- Alerts or Error Messages: Are there any notifications that need attention?
- Comparison to Expectations: Is the output roughly what you expected based on the weather?
Scheduling Routine Maintenance Checks
While solar panels are pretty low-maintenance, they aren’t completely ‘set it and forget it’. Think of it like your car – it needs occasional check-ups. It’s a good idea to have a qualified solar professional give your system a once-over every few years. They can check all the connections, look for any wear and tear on the equipment, and make sure everything is still performing at its best.
What a maintenance check might include:
- Visual Inspection: Checking panels for damage, dirt buildup, or shading.
- Electrical Checks: Testing inverter function and connection integrity.
- Mounting System Review: Ensuring the panels are still securely fastened.
- Performance Analysis: Comparing current output to historical data.
Taking care of your solar investment means more than just installing it. It’s about making sure it continues to provide clean energy efficiently and reliably for the long haul. A little attention after installation goes a long way in maximizing your system’s lifespan and your savings.
Essential Gear for Residential Solar Installers
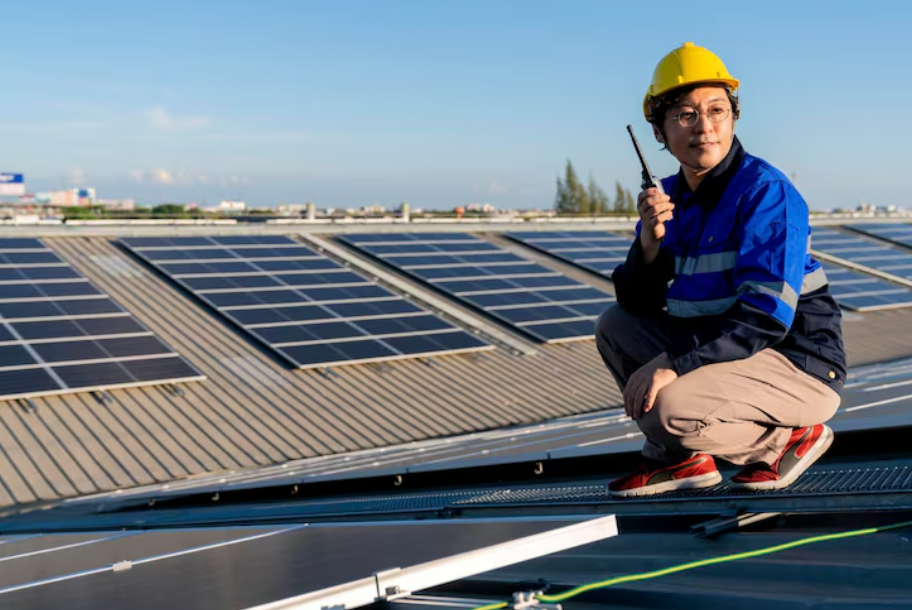
Working on a roof all day, especially under the sun, means you need the right stuff to stay safe and get the job done. Residential solar installers know this better than anyone. It’s not just about having the right tools; it’s about having the right clothes and gear to handle the elements and the physical demands of the work.
Protective Clothing for Sun and Rain
Staying comfortable and protected from the weather is a big deal. You’re out there rain or shine, and the sun can be brutal. Good rain gear is a must-have, not just for heavy downpours but also for windy days. Think a light shell for wind and drizzle, and something more robust for serious rain. Long-sleeved shirts are also key. Even when it’s hot, they protect your arms from sunburn and from getting burned on hot metal surfaces. A wide-brimmed hat is another lifesaver, offering shade for your face and neck. Some installers even use their hat brim to keep small parts like clips handy.
Comfortable and Functional Workwear
Beyond just protection, your workwear needs to be practical. Pants with built-in knee pads can save your knees a lot of grief, especially when you’re on your hands and knees for hours. Tool pouches on your pants are super handy for keeping frequently used items within reach, so you’re not constantly climbing up and down or digging through a tool bag. Good footwear is also important; you need something with grip for sloped surfaces and that’s comfortable enough for long days.
Essential Tools for Efficient Work
When it comes to tools, a few stand out for residential solar installers. An impact driver is often mentioned as a favorite because it handles so many tasks, from driving lag bolts to securing mounts. Having one with adjustable torque settings is a real plus, letting you tighten things just right without overdoing it. Other useful tools include a good set of wire strippers, a chalk line for marking, and a clamp meter for electrical checks. Sometimes, specialized tools like a conduit bender or even an infrared camera can be part of the kit for more complex jobs.
The best tip you won’t find in a manual? Have some basic integrity in your work. Nobody else may ever know, or it could take many years for them to discover your mistake, but you will know. It really goes a long way in building trust with your crew and ensuring a job done right.
Here’s a quick look at some commonly cited gear:
- Impact Driver: For driving bolts and securing components.
- Torque Wrench/Driver: To ensure fasteners are tightened correctly.
- Wire Strippers: For preparing electrical connections.
- Chalk Line: For marking layout on the roof.
- Safety Harness and Lanyard: Absolutely critical for working at heights.
- Tool Belt/Pouch: To keep essential items accessible.
- Work Gloves: For grip and protection.
- Safety Glasses: To protect eyes from debris.
- Sturdy Work Boots: With good traction and ankle support.
Frequently Asked Questions
Can I install solar panels myself?
While it’s technically possible to install solar panels yourself, it’s generally not recommended. Working on roofs and with electrical systems can be dangerous. Professionals have the training and tools to do it safely and correctly, ensuring your system works well and follows all the rules.
How do I know if my roof is good for solar panels?
Your roof should be in good shape and not too old. South-facing roofs usually get the most sun. Also, make sure there aren’t too many shady spots from trees or buildings, and that there’s enough clear space for the panels.
What kind of solar panels should I choose?
Look for panels from well-known companies that have good reviews and strong warranties. Panel efficiency, which is how well they turn sunlight into electricity, is important, but so is the manufacturer’s reputation and how long the warranty lasts.
Do I need special permission to install solar panels?
In many places, solar panels are considered ‘permitted development,’ meaning you might not need special planning permission. However, if your house is historic or in a special area, you might need to check with your local authorities. Your installer will also help make sure everything follows building rules.
How can I pay for solar panels?
There are often government programs, tax breaks, or local incentives that can help lower the cost of solar panels. You can also look into financing options like loans or leasing agreements to spread out the cost over time.
What happens after the solar panels are installed?
Once installed, your system will likely be connected to the main power grid. You’ll want to keep an eye on how much energy it’s producing. It’s also a good idea to have the system checked by a professional every few years to make sure it’s running smoothly.