DIY tufting rug kits have exploded in popularity, transforming living rooms into creative studios where anyone can craft custom rugs and wall art. Yet countless enthusiasts find their excitement dampened not by lack of artistic vision or technical skill, but by frustrating technical setbacks: tufting guns that skip stitches mid-project, adhesives that seep through backing fabric, or tools that jam at critical moments. The difference between a stunning handmade piece and a disappointing mess often comes down to two overlooked fundamentals that have nothing to do with your design abilities.
True mastery of tufting requires equal attention to the craft itself and the care of your materials and equipment. This article addresses both essential pillars that separate successful projects from abandoned ones: comprehensive maintenance routines that keep your tufting gun performing like new, and strategic adhesive selection that ensures your finished work remains intact and professional-looking for years. Whether you’re starting your first project or troubleshooting recurring issues, understanding these behind-the-scenes elements will transform your tufting experience from frustrating to consistently rewarding.
Essential Tufting Tool Maintenance for Flawless Projects
Your tufting gun represents the mechanical heart of every project you undertake, and its condition directly determines whether you’ll achieve smooth, consistent results or face constant interruptions. A neglected tool accumulates yarn fibers in critical mechanisms, develops sticky residue on moving parts, and gradually loses the precision that creates uniform pile height. These seemingly minor issues compound quickly—what starts as an occasional skipped stitch evolves into irregular tufting patterns that compromise your design’s visual impact. The frustration of restarting sections or abandoning projects altogether stems not from your technique, but from preventable mechanical degradation that robs your tool of reliable performance.
Establishing systematic maintenance transforms your tufting gun from a temperamental device into a dependable partner. The commitment required is modest—basic cleaning after each session takes mere minutes, while thorough maintenance demands only occasional attention—yet the payoff dramatically exceeds this small investment. Proper care extends your tool’s functional lifespan by years, eliminates mid-project failures that waste materials and time, and ensures each tuft penetrates your backing fabric with identical depth and consistency. This reliability allows you to focus entirely on creative decisions rather than troubleshooting mechanical problems, fundamentally changing your relationship with the craft from reactive problem-solving to proactive creation.
Daily and Post-Project Cleaning Routine
Begin every post-session cleaning by disconnecting your tufting gun from its power source—this non-negotiable safety step prevents accidental activation during maintenance. Use a stiff-bristled brush or compressed air to clear the needle area, focusing on the space where yarn enters the mechanism and around the needle shaft where fibers accumulate most densely. Pay particular attention to the yarn feed path and any visible moving components, as even thin layers of lint create friction that disrupts smooth operation. Finish with a visual inspection of the needle tip for bending or dulling, the cutting blade for yarn buildup, and all adjustment knobs to ensure they remain securely positioned. This five-minute routine performed consistently prevents 90% of common operational issues.
Deep Cleaning and Lubrication Schedule
Schedule comprehensive maintenance every four to six weeks of regular use, or whenever you notice decreased performance despite daily cleaning. Consult your manufacturer’s manual to identify which components can be safely disassembled, then carefully remove access panels or housings to expose internal mechanisms. Clean away old lubricant that has darkened or thickened, along with any embedded debris, using a lint-free cloth dampened with isopropyl alcohol. Apply fresh lubricant specifically recommended by your tool’s manufacturer to designated points—typically including the needle bar, scissor mechanism, and any visible gears or sliding surfaces. Using automotive or general-purpose oils risks gumming up precision parts, so invest in proper tufting gun lubricant. Reassemble carefully, ensuring all components seat correctly before testing with scrap fabric.
Troubleshooting Common Tool Issues
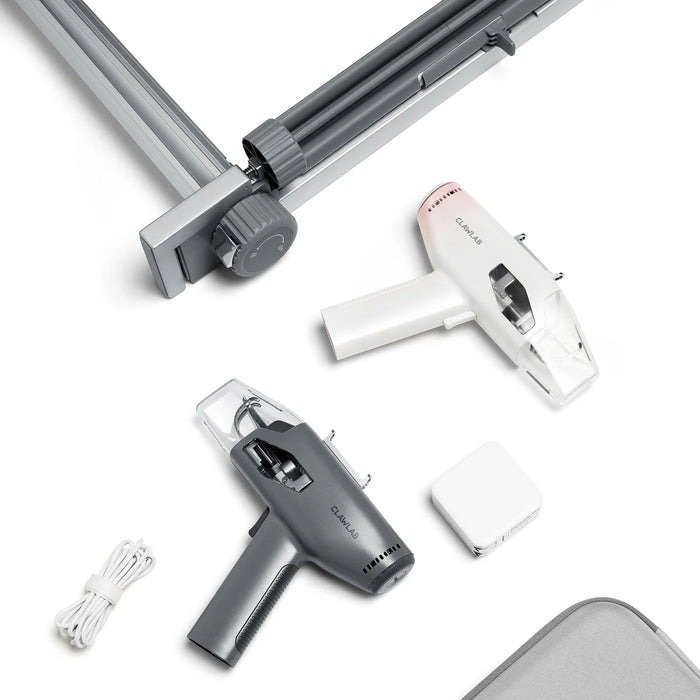
When yarn fails to feed smoothly, immediately check your tension settings and examine feed rollers for accumulated fiber that prevents grip. Inconsistent cutting typically indicates a dull or yarn-clogged blade—remove trapped fibers first, then assess whether sharpening or replacement is necessary based on visible edge condition. If your motor jams during operation, cut power instantly to prevent damage, then manually rotate accessible mechanisms to identify the obstruction point. Clear any wound yarn or foreign material, verify that all moving parts operate freely by hand, then resume work at reduced speed initially to confirm the issue is resolved. Many manufacturers, including Clawlab, provide detailed troubleshooting guides specific to their tufting gun models, which can help identify issues unique to particular mechanical designs.
Choosing the Right Adhesives for Your Tufting Projects
While a perfectly maintained tufting gun creates beautiful, uniform loops and cuts, your project’s longevity depends entirely on the adhesive choices you make during finishing. The wrong glue selection represents one of the most common points of failure in otherwise well-executed work—latex backing that peels away after months of use, primary fabric that stiffens into cardboard-like rigidity, or adhesive that bleeds through yarn to create visible discoloration on your rug’s surface. These failures rarely appear immediately, which makes them particularly insidious; a project that looks flawless when removed from the frame can deteriorate within weeks if secured with incompatible products.
The adhesive landscape for tufting projects divides into distinct categories, each formulated for specific materials and stress conditions your finished piece will encounter. Primary backing adhesives must penetrate deeply enough to lock individual yarn tufts permanently in place while remaining flexible enough to withstand foot traffic and repeated compression without cracking. Secondary backing adhesives face different demands—they bond two fabric layers together without adding excessive bulk or compromising the drape and feel of your finished rug. Understanding these functional differences prevents the disappointment of investing hours into tufting only to watch your work literally fall apart at the seams. The modest cost difference between appropriate and inappropriate adhesives pales in comparison to the value of your time and materials, making informed selection one of the highest-return decisions in your entire project workflow.
Primary Backing Adhesives: Locking in Your Tufts
Latex-based rug adhesive stands as the gold standard for securing tufts to primary backing fabric, offering the ideal balance of penetration, flexibility, and durability that tufted projects demand. This specialized formulation soaks into the weave of monk’s cloth or similar backing materials without bleeding through to the pile side, creating a rubberized layer that grips each yarn tuft while maintaining enough give to prevent cracking under stress. In contrast, standard PVA craft glue—despite its accessibility and lower cost—dries to a brittle finish that can stiffen your backing unpleasantly and shows greater tendency to seep through fabric, potentially matting or discoloring your yarn. For application, work on a protected flat surface and use a notched spreader or old credit card to distribute latex adhesive evenly across the back of your tufted area, maintaining a thickness that fully coats the fabric without forming puddles. Allow the manufacturer’s recommended drying time, typically 24 to 48 hours, before handling, and test a corner for complete cure by flexing the backing—it should bend without cracking or feeling tacky.
Secondary Backing and Finishing Adhesives
Attaching secondary backing materials requires different adhesive strategies depending on the weight and intended use of your finished piece. Spray adhesives excel for bonding lightweight felt or fabric backing to wall hangings and decorative pieces that won’t face abrasion, offering quick tack and even coverage without adding stiffness or bulk. For floor rugs subjected to regular foot traffic, opt instead for either heavy-duty carpet tape applied in a grid pattern across the back, or brush on additional latex rug adhesive around the perimeter and in strategic interior points to create a permanent bond that won’t separate under stress. When finishing edges, fabric glue designed for textiles provides the flexibility needed for binding tape or edge fabric to conform smoothly around curves and corners without creating hard, uncomfortable ridges that catch on feet or vacuum cleaners.
Step-by-Step: Executing a Tufting Project from Start to Secure Finish
Bringing together proper tool maintenance and strategic adhesive selection creates a workflow where each phase builds confidently toward a durable, professional result. This integrated approach eliminates the common scenario where crafters complete beautiful tufting work only to compromise it during finishing, or start projects with tools that create problems from the first stitch. By treating preparation, execution, and finishing as equally important phases—each supported by the maintenance and material knowledge you’ve gained—you transform tufting from a hit-or-miss hobby into a reliable creative practice. The following workflow demonstrates how these elements work together in real application, showing exactly when and how your behind-the-scenes knowledge translates into visible quality improvements in your finished piece.
Phase 1: Preparation with a Maintained Tool
Begin every project by performing your daily cleaning routine on your tufting gun even if it was cleaned after the last session, as dust accumulation during storage can affect performance. Inspect the needle for any bending and verify that tension settings match your chosen yarn weight. Stretch your primary backing fabric tautly across your frame, ensuring the weave runs straight without diagonal distortion that will cause uneven tufting. Transfer your design using washable markers or a grid system, then load your yarn and test on scrap fabric to confirm consistent pile height and clean cuts before touching your actual project surface.
Phase 2: The Tufting Process and Mid-Project Care
Start tufting from one corner of your design, maintaining steady pressure against the backing and moving at a consistent speed that allows your gun to complete each cycle fully. Work in manageable sections rather than jumping around the design, which helps you notice any performance changes immediately. For projects using high-shed yarns like wool or particularly long sessions spanning several hours, pause midway to perform a quick maintenance check: disconnect power, clear any visible fiber buildup from the needle area with compressed air, and verify your tension hasn’t shifted. This two-minute interruption prevents the gradual performance degradation that often goes unnoticed until it has already affected your work quality, ensuring your final rows match the precision of your opening stitches.
Phase 3: Finishing with the Correct Adhesive
Once tufting is complete, carefully remove your work from the frame and place it pile-side down on a protected surface large enough to accommodate the entire piece flat. Apply latex rug adhesive to the exposed backing using a notched spreader, working from the center outward to prevent trapped air bubbles and maintaining even coverage that fully coats the fabric without pooling. Allow the adhesive to cure completely for the manufacturer’s specified time—rushing this step by handling too early causes weak spots that will fail under use. After the primary adhesive has fully dried, trim any uneven pile with sharp scissors, then attach your secondary backing material using spray adhesive for wall pieces or additional latex adhesive for floor rugs, smoothing from the center outward to eliminate wrinkles. Finish by trimming excess backing fabric to leave a clean quarter-inch border, then apply binding tape or edge fabric with textile glue, working in small sections and allowing each to set before moving to the next for corners that lay flat and professional.
Building Long-Term Tufting Success
The path to tufting mastery extends far beyond artistic vision and technical skill with the gun itself—it rests equally on two foundational practices that often receive insufficient attention. Consistent tool maintenance transforms your tufting gun from an unpredictable source of frustration into a reliable instrument that delivers uniform results session after session, while strategic adhesive selection ensures that every hour invested in tufting translates into a finished piece that maintains its beauty and structural integrity through years of use. These behind-the-scenes elements may lack the immediate visual appeal of yarn selection or design planning, but they ultimately determine whether your creative efforts result in lasting satisfaction or premature disappointment.
Armed with comprehensive maintenance routines and informed adhesive choices, you now possess the complete toolkit for approaching any tufting project with confidence. The five minutes spent cleaning your gun after each session and the careful consideration given to latex versus spray adhesives represent small investments that yield disproportionate returns in project success rates and finished quality. Whether you’re preparing to start your first DIY tufting rug kit or seeking to elevate projects that have fallen short of expectations, apply this knowledge systematically—your next creation will reflect not just your artistic abilities, but the professional-grade foundation that proper care and material selection provide.