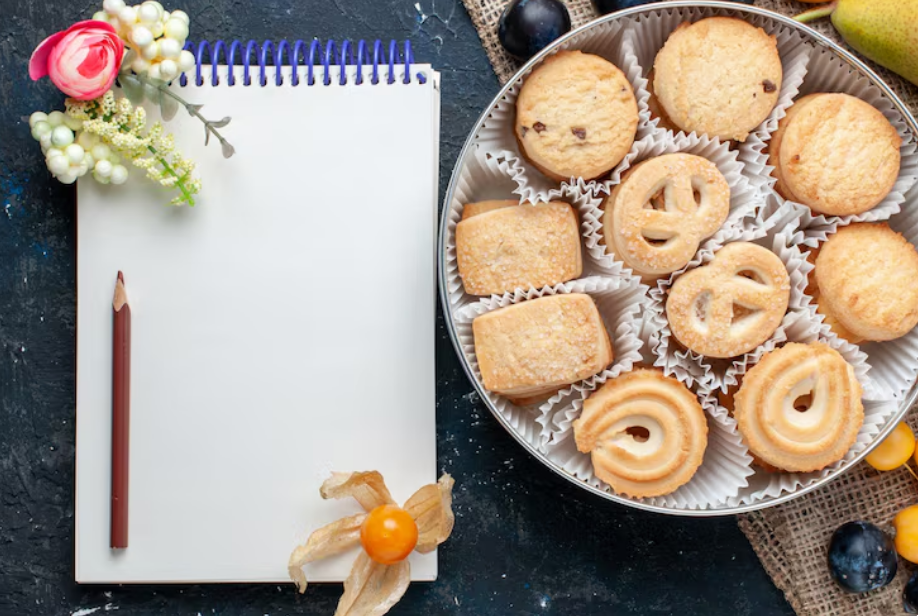
Planning a party or event? Thinking about favors that guests will actually remember and enjoy? Custom cookies are a fantastic way to add a personal touch. They look great, taste even better, and can be made to fit any occasion. Forget those generic party favors; let’s talk about making some truly special custom cookies that everyone will love taking home.
Key Takeaways
- Designing custom cookies involves picking the right look, theme, and size to match your event.
- Choose a cookie base that’s good for decorating, like sugar cookies, and think about flavors guests will enjoy.
- Gather all your decorating supplies, from different kinds of icing to a fun mix of sprinkles and tools.
- Set up a decorating station that’s easy for guests to use and keeps the mess contained.
- Plan how you’ll package your custom cookies so guests can take them home safely and nicely.
Designing Your Custom Cookies
Personalizing Cookie Appearance
Making custom cookies for an event is all about the details. You want them to look good, obviously, but also to fit the vibe of whatever you’re celebrating. Think about the main colors of your event. Are they bright and bold, or more muted and elegant? This will guide your choices for icing colors and any edible decorations you plan to use. The goal is to create a cohesive look that ties everything together. For example, if you’re having a baby shower with a pastel theme, you’ll want soft blues, pinks, and yellows for your icing. If it’s a corporate event, maybe stick to your company’s brand colors. It’s these little touches that make the cookies feel truly special and not just a generic treat. You can even get custom cookies Houston that match specific logos or monograms if you’re looking for something really unique.
Incorporating Event Themes
This is where the fun really begins! Your cookies can tell a story or represent the event’s theme in a really creative way. For a wedding, you might go with elegant floral designs or even little cookie versions of the bride and groom. A birthday party could feature characters from a favorite cartoon, or maybe just the number of the birthday person. For a holiday gathering, think snowflakes, pumpkins, or festive trees. The possibilities are pretty much endless. It’s a great way to add a playful or sophisticated element to your party favors.
Here are some ideas based on common event types:
- Birthdays: Age numbers, favorite characters, party hats, balloons.
- Weddings: Rings, hearts, wedding dresses, tuxedos, floral motifs.
- Baby Showers: Storks, baby bottles, rattles, onesies, cute animals.
- Holidays: Seasonal symbols (e.g., turkeys for Thanksgiving, shamrocks for St. Patrick’s Day).
- Corporate Events: Company logos, brand colors, relevant industry symbols.
Choosing Cookie Shapes and Sizes
The shape and size of your cookies really matter for both decoration and how they’ll be presented. Smaller cookies are great for a variety of designs and can be handed out more easily as little treats. Think about bite-sized cookies that guests can enjoy without a mess. Larger cookies can make a bigger statement, especially if they have intricate designs or are meant to be the star of the show. You’ll also want to consider how they’ll fit into your packaging. A good mix of shapes can add visual interest too. Maybe some round cookies for a classic look, some squares for a modern feel, and a few fun, themed shapes to really tie it all together. It’s about finding that sweet spot between visual appeal and practicality for your event.
| Cookie Size | Typical Use Case | Design Complexity | Packaging Consideration |
| 1-2 inches | Mini favors, bite-sized treats | Simple outlines, dots | Fits easily in small bags/boxes |
| 3-4 inches | Standard favor, centerpiece cookie | Moderate to intricate | Standard favor boxes, larger bags |
| 5+ inches | Statement piece, large gift | Highly intricate, detailed | Custom boxes, tins, or individual wrapping |
When you’re planning custom cookies, think about the overall guest experience. How will they be displayed? How easy are they to eat? Making these decisions early on helps avoid last-minute scrambles and ensures your cookie favors are a hit.
Selecting the Perfect Cookie Base
When you’re planning custom cookies as event favors, the cookie itself is just as important as the decoration. You want something that tastes good and holds up well to decorating. Think about what your guests will enjoy most – a sweet treat they’ll actually want to eat, not just look at.
Sugar Cookies for Decorating
For custom cookies meant for decorating, a classic sugar cookie is usually the way to go. These cookies have a firm texture that’s perfect for holding intricate designs. They also have a mild, sweet flavor that doesn’t overpower the icing and decorations. The key is a recipe that bakes up flat and doesn’t spread too much, so your carefully crafted designs stay put. You can find many recipes online, but look for ones specifically mentioning “cut-out” or “decorated” cookies. They often use less leavening and a bit more flour to achieve that ideal structure.
Flavor Varieties for Snacking
While sugar cookies are great for decorating, sometimes you want a cookie that’s more of a standalone snack. For events where guests might want to just grab a cookie to enjoy, consider offering a few different flavor options. This adds a nice touch and caters to different tastes. Think about things like:
- Chocolate Chip: A crowd-pleaser that’s always a hit.
- Peanut Butter: Rich and satisfying for those who love a nutty flavor.
- Lemon Zest: A lighter, brighter option that’s refreshing.
- Gingerbread: Especially popular around the holidays, with a warm, spicy kick.
These can be made ahead and served alongside the decorated cookies, or even offered as an alternative favor if you’re doing a cookie decorating station.
Dietary Considerations for Guests
It’s thoughtful to consider guests with dietary restrictions. If you know you’ll have guests who are gluten-free, vegan, or have nut allergies, it’s a good idea to have a cookie option that accommodates them. Many recipes have been adapted for these needs, and you can often find delicious versions of sugar cookies or other favorites that are free from common allergens.
Planning ahead for dietary needs shows your guests you care about their comfort and enjoyment. Even a small batch of specially made cookies can make a big difference for someone who usually can’t partake in treats.
Here’s a quick look at common considerations:
| Dietary Need | Potential Cookie Base Options |
| Gluten-Free | Almond flour, oat flour (certified GF), or GF flour blends |
| Dairy-Free | Coconut oil, plant-based butter, or other dairy substitutes |
| Vegan | Egg replacers, plant-based milk, and dairy-free butter/oil |
| Nut-Free | Standard flour bases, avoiding nut flours or additions |
Essential Decorating Supplies
Alright, let’s talk about what you’ll actually need to make these cookie decorating sessions a hit. It’s not just about the cookies themselves, but having the right tools makes all the difference. Think of it like an artist’s palette – you need the right brushes and colors to create something amazing.
Icing Types and Preparation
When it comes to icing, you’ve got a couple of main players. Royal icing is your go-to for intricate designs and those crisp outlines because it dries hard. Then there’s buttercream, which is softer and sweeter, great for a more rustic look or if your guests are big on taste over intricate art. For a party, especially with kids, a simple powdered sugar glaze is also a good option – it’s easy to make and dries relatively quickly.
- Royal Icing: Dries hard, perfect for outlining and flooding.
- Buttercream: Softer, sweeter, and easier to spread.
- Glaze: Simple, sweet, and quick-drying.
Adding color is where the fun really begins. Gel food coloring is your best friend here. A little goes a long way, and it won’t water down your icing like liquid colors can. You can get some really vibrant shades this way. Aim for about 3-4 colors, including white, to keep things manageable but still offer variety.
Preparing the icing ahead of time is a lifesaver. Make sure it’s the right consistency – not too thick that it’s hard to pipe, and not too thin that it runs everywhere. You can always thin it out with a tiny bit of water or thicken it with more powdered sugar if needed. Having it ready to go in piping bags or squeeze bottles makes the decorating process much smoother for everyone.
A Spectrum of Sprinkles and Edibles
This is where guests can really let their personalities shine! Sprinkles are a must, of course. Think beyond the basic jimmies – consider sanding sugars for sparkle, nonpareils for tiny pops of color, edible glitter for that extra pizzazz, and even small candies like mini M&Ms or crushed candy canes. You can even create custom sprinkle mixes to match your event’s theme.
| Decoration Type | Description |
| Sprinkles | Jimmies, nonpareils, stars, shapes, etc. |
| Sugars | Sanding sugar, coarse sugar for texture |
| Edible Glitter | For a touch of sparkle and shine |
| Small Candies | Mini M&Ms, chocolate chips, crushed candies |
| Other | Marshmallows, edible pearls, dragées |
Arranging these in small bowls or even an ice cube tray makes them super accessible and prevents a big sprinkle explosion. It also lets guests easily see all their options.
Tools for Creative Expression
Beyond the icing and sprinkles, a few simple tools can really help your guests get creative. Piping bags with various tips are classic, but for a more relaxed vibe, especially with younger guests, disposable squeeze bottles are fantastic. They’re less intimidating and give a good amount of control. Don’t forget toothpicks or a scribe tool for fine details and making swirls. Small offset spatulas can be helpful for spreading icing, and parchment or wax paper is a must for easy cleanup. Having a few different options means everyone can find a way to decorate that feels comfortable for them.
Setting Up Your Decorating Station
Alright, let’s talk about getting your space ready for some cookie decorating fun. This is where the magic happens, and a little bit of planning goes a long way to keep things smooth and enjoyable for everyone. You want your guests to feel like they’re walking into a creative haven, not a chaotic mess.
Creating Individual Guest Stations
Think about giving each person their own little spot to work. This makes it feel more personal and less like a free-for-all. You don’t need anything fancy. A clean placemat, a sturdy paper plate, or even a rimmed baking sheet can work wonders. On each station, you can place a few cookies, a small bowl of sprinkles, and their personal icing bag or bottle. This way, everyone has their supplies right at their fingertips.
- Placemats or Baking Sheets: A wipeable surface is your best friend here.
- Individual Sprinkle Bowls: Small ramekins or even cupcake liners work great for portioning out the fun stuff.
- Napkins: Have a couple ready for each guest – sticky fingers are part of the experience!
Organizing Supplies for Easy Access
When everything is laid out nicely, people can just grab what they need without a fuss. It also helps you keep track of what you have. A muffin tin is surprisingly useful for holding small amounts of different sprinkles or candies. For larger groups, you might want to set up a central “sprinkle bar” where people can scoop their own.
Here’s a quick rundown of what to have ready:
- Icing: In piping bags or squeeze bottles, ready to go.
- Sprinkles & Edibles: Sorted into small containers.
- Tools: Toothpicks for fine details, small spatulas for spreading.
- Cookies: Placed out so guests can choose their favorites.
Protecting Surfaces from Messes
Let’s be real, cookie decorating can get a little messy. Icing can drip, sprinkles can fly. To avoid a major cleanup job later, cover your tables with disposable tablecloths or even butcher paper. If you have a rug nearby, consider rolling it up for the duration of the decorating session. It’s better to protect your furniture and floors beforehand than to scrub them afterward.
A little prep work upfront saves a lot of headache later. Think about where the icing might drip and cover those areas. Even upholstered chairs can get sticky if icing lands on them. Rolling up a rug can prevent accidental stains and make sweeping up stray sprinkles a breeze.
Having a designated, protected area means everyone can relax and focus on the creative part, rather than worrying about making a mess.
Packaging Your Custom Cookies
Alright, so you’ve got these amazing custom cookies ready to go. Now comes the part where you make them look as good as they taste, and importantly, keep them safe until they reach your guests. Presentation really matters, especially for favors!
Take-Home Boxes and Containers
For a more substantial feel, sturdy boxes are a great choice. Think about those nice, pop-open boxes that don’t require any assembly – they save you time and look professional. Adding a bit of crinkle paper or shred inside not only cushions the cookies but also adds a nice visual touch. It makes the unboxing experience feel a little more special.
- Sturdy Cardboard Boxes: Look for boxes specifically designed for baked goods. They often have a window so the beautiful cookies can be seen.
- Crinkle Paper or Shred: Use this to fill empty space and prevent cookies from shifting during transport.
- Size Matters: Make sure the box is appropriately sized for the number of cookies. Too big and they’ll slide around; too small and they might get squished.
Cellophane Bags and Ribbons
If you’re going for a simpler, more budget-friendly option, individual cellophane bags are fantastic. They keep each cookie fresh and protected. You can heat-seal them for an extra secure closure, or simply tie them off with a pretty ribbon or some baker’s twine. A nice ribbon can really tie the whole look together and match your event’s color scheme.
- Food-Safe Cellophane: Always use bags made for food contact.
- Heat Sealer: For a professional finish, a heat sealer works wonders.
- Ribbons & Twine: Choose colors that complement your cookie design and event theme.
Custom Cookie Tins for Gifting
Want to really impress? Custom cookie tins are a step up. They’re not just packaging; they become a keepsake. These are perfect for more formal events or when you want to give a truly memorable favor. They offer excellent protection and a touch of elegance that guests will appreciate long after the cookies are gone.
When selecting your packaging, always consider the journey your cookies will take. Will they be carried by hand, shipped, or placed in a gift bag? The packaging needs to withstand the intended transport method while maintaining its aesthetic appeal and protecting the delicate cookie creations inside.
Making Ahead and Storing
Planning a cookie decorating event can feel like a lot, but a little prep work goes a long way. Getting things ready ahead of time means you can actually relax and enjoy the party when your guests arrive. It’s all about making the process smoother for you and more fun for everyone else.
Preparing Cookies in Advance
Baking your cookies a day or two before the event is a smart move. Once they’re completely cooled, store them in airtight containers at room temperature. This keeps them fresh and ready for decorating. If you’re making a lot of cookies, consider baking them over a couple of days to avoid feeling overwhelmed. For example, you could bake sugar cookies on Tuesday for a Thursday event.
- Bake cookies 1-3 days before the event.
- Store cooled cookies in airtight containers.
- Keep containers at room temperature, not in the fridge.
Storing Icing for Freshness
Icing is best made relatively close to decorating time, but you can definitely get a head start. Both royal icing and simpler cookie icings can be made 2-3 days in advance. After making it, cover it tightly and keep it in the refrigerator. You can store it in piping bags, squeeze bottles, or just a covered bowl. Before you use it, let it come back to room temperature. If it seems too thick, a tiny bit of water or milk can help thin it out. Give it a good mix or shake to get it back to a smooth consistency.
| Icing Type | Storage Time (Ahead) | Storage Method | Notes |
| Royal Icing | 2-3 days | Refrigerated, airtight container/bag/bottle | May need thinning with water/milk; whisk/shake to reincorporate. |
| Simple Cookie Icing | 2-3 days | Refrigerated, airtight container/bag/bottle | May need thinning with water/milk; whisk/shake to reincorporate. |
Timeline for Event Preparation
Here’s a general schedule to help you stay on track:
- 1 Week Before: Finalize cookie designs and shapes. Order any special supplies like unique sprinkles or piping bags. Decide on the number of cookies needed per guest (6-8 is usually a good amount, plus a few extra).
- 2-3 Days Before: Make cookie dough and bake all cookies. Let them cool completely.
- 1-2 Days Before: Prepare the icing. Store it properly in the fridge.
- Day Before: Set up your decorating station, organize supplies, and clean your space. This way, the day of the event is all about fun!
Getting the bulk of the work done a day or two ahead really makes a difference. It lets you be present with your guests instead of rushing around trying to finish last-minute tasks. Think of it as setting the stage for a great party.
Wrapping It All Up
So there you have it! Planning custom cookies as favors might seem like a lot, but with a little thought, it’s totally doable. From picking the right cookie shape and flavor to getting the decorations just right, these sweet treats are sure to be a hit. Your guests will love taking home something so personal and delicious. It’s a small detail that really makes an event feel special, and honestly, who doesn’t love a good cookie?
Frequently Asked Questions
Can I make the cookies and icing ahead of time?
Yes, you can totally make the cookies and icing a day or two before your event! Bake the cookies and store them in an airtight container. Make the icing and keep it in the fridge. Just let it warm up to room temperature before you need it, and you might need to add a tiny bit of milk or water to get it back to the right thickness.
What kind of cookies are best for decorating?
Sugar cookies are usually the best choice for decorating because they have a nice flat surface and don’t spread out too much when they bake. This makes them a perfect canvas for all your creative icing designs.
How should I set up a decorating station for guests?
Set up individual spots for each guest, maybe using baking sheets or large placemats. Put out bowls of sprinkles, different icing colors in piping bags or bottles, and any other fun decorations. Make sure there’s enough space for everyone to work comfortably and have a blast!
What are some good ways to package decorated cookies for guests to take home?
Clear cellophane bags tied with pretty ribbons are a simple and cute option. You can also use small boxes or decorative cookie tins. This way, guests can easily carry their sweet creations home without making a mess.
What supplies do I need for decorating?
You’ll need baked cookies, icing in various colors, and lots of fun decorations like sprinkles, edible glitter, and candies. Also, have tools like piping bags or bottles, small spatulas, and toothpicks handy for detailed work.
How can I make sure the icing dries properly before guests leave?
Royal icing usually dries in about 2 hours, but you can speed it up by putting the cookies in the fridge for a bit. Some icings take longer, up to a full day, to dry completely. It’s best to arrange them in a single layer in their take-home boxes so they don’t smudge.