Transitioning to solar energy is one of the smartest investments a homeowner in the UK can make—both for cutting electricity bills and reducing environmental impact. However, the solar panel installation process can seem daunting if you’re unfamiliar with how it works.
This article breaks down the entire process into clear, actionable steps, so you’ll know exactly what to expect when installing solar panels on your home.
1. Initial Home Assessment and Feasibility Check
The journey begins with a home visit or virtual assessment from a solar professional. During this stage, key factors are evaluated:
- Roof orientation and angle – South-facing roofs are ideal in the UK.
- Shading – Trees, chimneys, or nearby buildings may reduce solar output.
- Roof condition – A strong, healthy roof is essential before installation.
- Electrical system – The current setup must be compatible with a solar system.
This stage determines whether your home is suitable for solar energy and helps estimate potential energy savings.
2. Custom System Design and Quote
Once feasibility is confirmed, the installer designs a tailored system based on your:
- Electricity usage
- Roof size and orientation
- Budget and future expansion goals (e.g., battery storage)
The quote will typically include:
- Solar PV panels
- Inverter
- Mounting hardware
- Cabling
- Monitoring system
- Optional add-ons like batteries or EV chargers
You’ll also receive an estimate of your system’s expected annual generation and potential savings.
3. Permits, Planning Permission, and Grid Application
In most residential cases, planning permission is not required due to permitted development rights. However, if your property is:
- In a conservation area
- Listed
- Has a flat roof or unusual structure
…then extra permissions may be needed.
Your installer will usually handle DNO (Distribution Network Operator) applications to notify or get approval for connecting your system to the national grid.
4. Scaffolding Setup and Material Delivery
Once paperwork is done, the physical work begins. The first on-site step is setting up scaffolding around your home. This ensures safe access to the roof.
On the same day or shortly after, all equipment—solar panels, inverter, cables, and any batteries—will be delivered to the site.
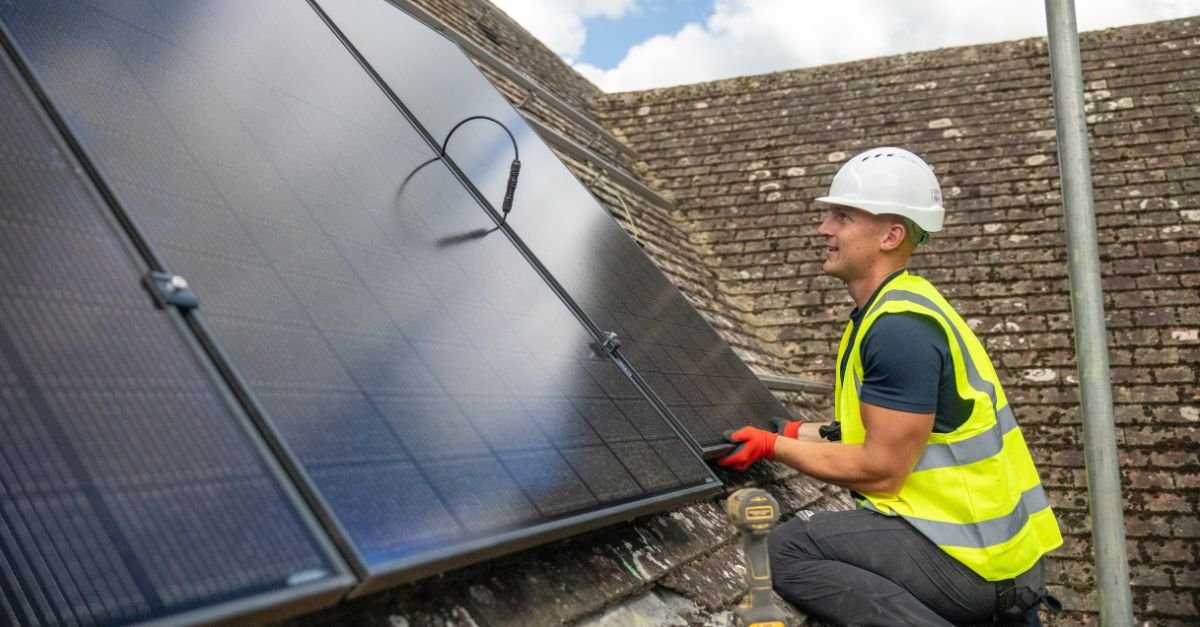
5. Solar Panel Mounting and Roof Work
The installation crew begins by:
- Attaching mounting brackets to the roof structure.
- Securing rails to those brackets.
- Installing panels on the rails and clamping them in place.
All roof penetrations are sealed to prevent leaks. Installers are trained to comply with MCS (Microgeneration Certification Scheme) standards and UK building regulations.
6. Wiring and Inverter Installation
After the panels are mounted, the electrical work begins:
- Panels are connected to DC cabling that runs through the roof into your property.
- The DC cabling is routed to the inverter, which converts it into AC electricity.
- The inverter is typically installed in a loft, garage, or utility area.
- If you opt for a solar battery, it will also be installed and wired at this stage.
7. Connecting to the Consumer Unit and Testing
Once everything is wired:
- The inverter is connected to your consumer unit (fuse box).
- An AC isolator is installed for safety.
- Your system is tested for voltage, current, and efficiency.
- Monitoring software or apps are activated to let you track performance.
At this point, your system is nearly ready to go live.
8. DNO Approval and Grid Connection
Depending on your system’s size and the DNO’s timeline, your installer may need to wait for formal approval before full grid connection.
Smaller systems often fall under the G98 notification (approval post-installation), while larger systems (above 3.68kW per phase) require G99 pre-approval.
Once approved, you’ll be officially connected to the grid, meaning:
- You can use your own solar electricity.
- Surplus energy can be exported back for compensation under the Smart Export Guarantee (SEG).
9. Documentation and Certification
The installer will provide you with:
- MCS certificate
- Electrical installation certificate
- DNO approval confirmation
- Panel and inverter warranties
- System handbook and monitoring instructions
These are crucial for insurance, future maintenance, and SEG registration.
10. Ongoing Monitoring and Maintenance
Most modern systems come with online monitoring portals so you can:
- Track energy production in real-time
- Monitor battery levels
- Detect faults early
While solar systems require minimal maintenance, occasional cleaning and yearly checks help maintain optimal performance. You can read more about best practices here:
solar panel maintenance tips UK
Final Thoughts: Ready to Make the Switch?
By understanding the step-by-step process of solar panel installation, you can move forward with confidence. The process typically takes 1-3 days depending on system size, but the savings and environmental benefits last for decades.
Switching to solar not only cuts your electricity bills but also contributes to a cleaner, greener UK.
FAQs
1. How long does solar panel installation take?
Typically 1 to 3 days for residential systems, depending on complexity and weather.
2. Do I need planning permission?
Not usually, unless your home is listed, in a conservation area, or has an unusual roof structure.
3. Can I install solar panels on a flat roof?
Yes, but it may require special mounting systems and may need planning approval.
4. What happens during a power cut?
Standard grid-tied systems shut off during power cuts for safety. Battery backup systems can provide limited power during outages.
5. When will I start saving money?
Savings start from day one of generation, though your return on investment depends on system size, usage, and export tariffs.